Sunday, December 8, 2013

Extra Chrome Saved Passwords Security Feature With The New Chrome Canary

Web Developers deciding which Chrome Channel to use the beta or the stable one, it’s really and largely depends on their tolerance of bugs and strength of desire to try the latest features and improvements. But there is a way to get the best of both worlds: a perfectly rock-solid stable experience and access to the latest features say hello to the Canary Channel.

Chrome Canary is Google’s code name for its latest Chrome browser which is currently in testing, is once again available to both developers and users. Chrome Canary is not necessarily for the faint of heart in its current state, it’s a decidedly beta product that comes with warnings from the search company that says it could crash at any time and shouldn’t be considered a replacement for Chrome or any other browser at the moment. Quite the contrary, Chrome Canary is a work in progress, a piece of software that should not be relied on for the most important tasks. Still, Chrome Canary is an important browser for those who have been using Google’s software for some time. Chrome Canary represents the future of Google’s browser, and includes several improvements over the current platform that should make for a better experience.

Unlike the beta and dev channels, Google Chrome Canary installs separately alongside the regular version of Chrome. It doesn't change, modify or affect any files; nothing is shared between them. This means that you can keep a stable version of Chrome for your regular day-to-day work, but also have a safe way -playground- to toy around with the latest features, changes and flags.

Note: Once caveat being that some settings altered on Canary will sync – but only if you sign in.

The major meaningful reasons you should try Chrome Canary are:
  • It’s safe – it doesn’t affect regular chrome browser.
  • It’s fun – you get to try the latest features earlier before anyone could see it.
  • It auto-updates – unlike Chromium snapshots, Canary is updated almost daily.
  • It’s useful – developers can work with newer chrome features & APIs sooner.
  • Its proper Chrome – all of Chrome’s features are present, including flash Quick Office viewer and a PDF reader.

New Security Feature

Up until now, anyone with access to your PC could view all of your saved passwords in Chrome by pointing the browser to chrome://settings/passwords, but that changes in the newest build of Chromium, the open-source project  that chrome is based on. When the update eventually makes its way to the official version of Chrome, the browser will prompt users to re-authenticate using the Windows/OS X user’s password before showing any saved passwords. And sooner the worries about revealing saved passwords on Chrome will vanish.
Google provides official Canary builds for windows and Mac (sorry for Linux users) and, once downloaded, it installs just like regular Chrome.

Canary uses different colored icon to that of regular Chrome, helping ensure that you don’t accidentally start the wrong one. This means you can pin it to your start screen, task bar, or dock without creating confusion!


So what is that you are waiting it’s time to be fabulous and adventurous as well, go and grape your free piece of copy from here >> Download Chrome Canary

Tuesday, November 26, 2013

Breaking News: CloudCraker! An Online Pentesting Service

Holla! It’s being always a dream to meet a reliable, flexible, and trust worthy online PenTesting tool or service and it’s just happen to day when I intentionally found CloudCracker.com while I was serving the web, more importantly I was absolutely impressed about the fact that this online website is even much faster and accurate than a lot of third party Cracking and PenTesting tools and softwares.

So what is cloud cracker and what it does? It’s an online password cracking service for penetration testers and network auditors who need to check the security of WPA protected wireless networks, crack password hashes, or break document encryption.

In this PenTesting service you will be asked some data and that you need to provide (not the password), and then it will try identifying your password (it’s done in the same way the hacker tries to find out your password), if it fails to find your password then you are ready to use your wireless network and if it finds out your password then you have no other choice left other than changing your password.

Disclaimer: This post is not a complete guide or tutorial about how to use cloudcraker’s service but it’s just a fantastic cracking alternate that I’ve found instantly and I just wanted to share with you the news to be aware of the service if you are not already knew it, so don’t relay this post for the complete and confidential reference just take its as breaking news from LBR’s news desk.

For a formal info and reference visit cloudcraker’s official website from here >> cloudcraker.com and make your own appropriable judgements.


Final note: Honestly I’m in a middle of confusion about what kind of topics or niches to write articles about because nowadays technology arena is hilariously growing and vanishing at the same time, so if you have a query, suggestion, or special request try to scroll down till you reach the comments section below, so you can leave your query suggestion, or whatever you’ve in mind just right there. And I’ll always appreciate your comments because I’m sure they’ll help me provide rich articles and tutorials continuously about the things you ask, suggest, and request.  So feel free and let me know what you would love to see next time on LBR blog.

Monday, November 25, 2013

How To Stay Safe&Secure While Serving The Web

When you first enter to the connected world of the internet try to imagine a place where there is so many Apps and Services don't even cost a penny; games, social networks, videos, music, and pictures it’s almost like virtual paradise, but looking under Neath that wonderland there is a far greater told being collected-your identity- names, locations, addresses, family and friendship connections, likes, searches, browsing history.

Basically the more the internet you use the more information you give corporations so they can turn around and sell your identity to the heights bitter.

So here a great question comes into the mind, is there a way to be a part of  this online economy without sacrificing your identity and  privacy? YES you can lie!
Here is the four major ways online companies collect your data and four major ways you can hide your data from them.

First is Location: By using your computers ip-address fine online services can determine where you connecting to the internet from, a good practice are to hide your ip using a Proxy or what is called Virtual Private Network (VPN). And there is a plenty of plugins for your specific browser type that allow you to do both i.e.  Switchy and FoxyProxy, there is also free services out there such as CyberGhost that allow you to serve web while hiding your ip-address, you can also build your own VPN  service using computers in different locations, or you  can pay premium vpn services like [witopia], which make it look like you are from a different  country all together.

Second is site tracking and browsing history: when you visit certain websites they collect data on you even if you aren't aware of it, i have already mentioned your ip-address but also your browser type and your Operating System, what pages you’ve visited and what you clicked on. Depending on your browser again you can use third party plugins like [DNT+] that can block these websites from collecting information on you, or you can use harder security browser systems such as Tor and SRWare Iron which is like chrome.
Normally if you want to use an online service you've to sign up using personal information but it doesn't necessarily have to be your personal information that is where the Third step comes into play.

Third Fake Identities: if you go to fakenamegenerator.com you can generate intire fake identities that you can use to fill out forms, another good one is datafakegenerator.com that even let you generate fake Credit Card number. Fourth step concerns the most important part of information your email address.

Fourth Disposable Emails: This is quite tricky because most online services require a valid email before you can complete the registration process. So you need a fake anonymous email that you can actually check, the best options that can allow this, is the disposable email services such as 10minutemail, guerrillamail or mailnesia for a longer lasting fake email address.

Final note: Although it’s not 100% anonymity these tips will at least give you 90% to the way there.

At last I'd love to hear some of the methods you guys use to stay hidden online let me know in the comments section. That is it for this short tutorial until next time hack some fun into your week ends. Cheers

Saturday, November 2, 2013

Use Any Trial Software Forever! No Crack Needed

In today’s world all software developers and computer engineers continuously create a huge bundle of professional applications, standalone softwares, and smooth web applications to integrate social media sites as well as the other custom websites out there on the World Wide Web.

And here is what they do while they're developing and coding those spectacular and helpful new productions, they usually set and implement some certain terms, protocols, and regulations for the usage of any specific element[software] of their production; i.e. Professional software firms like Microsoft always set and give their productions/softwares such as Microsoft Office a certain and specific trial period which gives the user a few days to use Microsoft Office without purchasing the software, that is good so far and it’s the professional way to deal with gaining some revenue from your regular users, customers, and clients while giving them a demonstration and checking time to convince them that your software is valid and your services are reliable so later on when the trial version expires they go and get your full software package by purchasing it.

But what about if there are others like me and you those who don't want to purchase the software at all and the same time need to use the software forever without paying a penny, so in that case I’ve decided to give them a chance by telling them a simple technique which can help them to use any specific software of their choice for ever without worrying about the trial period.

And there may be a number of different ways to use a trial version of a software for ever like using Keygens or Cracking the software which is absolutely illegal and impossible to do for a normal computer user but in this tutorial I will show and another way which is much simpler, easier and safer than all of the previous methods you’ve ever known and its to use a third party software called RunAsDate so to know how this makes any trial version of a software works for ever, just follow below steps.
Before starting the steps let’s get tuned and review what RunAsDate software is, its definitely a small utility that allows you to run a program on the date and time that you specify. This utility doesn't change the current system date and time of your computer, but it only injects the date/time that you specify into the desired application. You can run multiple applications simultaneously, each application works with different date and time, while the real date/time of your system continues to run normally. Now let’s proceed to the steps.
  • First of all we have to download RunAsDate software and there are two available versions one for 32bit systems and one for 64bit systems so first make sure whether your system is a 32bit or 64bit then follow along and click one of the below download links according to your system type.
    RunAsDate download links
    : for
    32bit system // for 64bit systems.
  • After clicking the download link and the download completes you’ll get a zipped file so go and unzip it by using WinRAR, WinZip, and 7zip or any other tool that you can get which can unzip the downloaded file.
  • After unzipping the downloaded file you will get a separate three files in that file, so try to double click the one that says RunAsDate.exe or follow the below image for a better demonstration.


Note: RunAsDate.exe does not need any installation just double click it and it will automatically run and for now when the application launches you will have a window like the one in the below image.

  • Now if we look deeply to the previous window we will notice that the the window consists three fields and a few checkboxes and buttons, so we are not going to use all of them for now we'll just use the first two fields the one “application to run:” and the one beneath it –for a better understanding look the below two images, and from this stage will chose our software from our PC’s installation directly by clicking the little Browse button on the top right corner of the application so click there and choose your desired trail software on your system and on the next field just specify the date you have installed the trial software you want to run forever and to do that make some guessing or if you noted earlier the date that will be much better.


Note: I usually note the date of installing any trial software on a sheet or I mark it on a calendar and I recommend you to do so.


  • Now if you have done the previous steps correctly go and click “Run” and wait a second then the application will instantly launch. And the best of is you can make a shortcut for your favorite application by just giving a name to your shortcut and click that button says “Create a desktop shortcut>>” and there you go you'll find a shortcut on your desktop so whenever you need to launch that specific software it’s not must to again launch RunAsDate and then browse your software from there, just go and click that shortcut.
Congratulations now you can use almost every trial software you or you may have on your system forever, with using RunAsDate but the question is how RunAsDate software works so below I will tell you in short sentences I hope that you can catch up something from it. 
RunAsDate intercepts the kernel API calls that returns the current date and time (GeSystemTime, GetLocalTime, GetSystemTimeAsFileTime), and replaces the current date/time with the date/time that you specify.
Final note: if you get confused about the steps try to pin your question on the comments section below, hopefully you'll get a reply as soon as possible. Cheers

Sunday, October 20, 2013

Pipe App! A Direct and Secure File Transfer

Pipe App. is a file transfer web application based on Adobe Flash with peer-to-peer functionality at its core, and most importantly there is no software to be installed on the user’s computers both the sender and the receiver because Pipe is a web application with the capability of running on Facebook’s app platform.

Also because Pipe relies on Facebook for user authentication and matching, the user is certainly addressed which makes the transaction process safe and secure. To get the full functionality of Pipe you don’t need to install any extra software on your computer, and neither do your friends. Just open the Pipe app on Facebook and you have immediate access to all of your friends. The Pipe app creates a direct connection between you and an online friend. Files do not and won’t pass through Facebook as the file is transferred directly from your computer to your friend’s computer.
Pipe has a tree hilarious file transmission types formally named asGreen Pipe, Blue Pipe and Grey Pipe

Green Pipe: it’s the kind of transmission you must use whenever your friend is online on the Pipe app, and it’s really simple and goes this way: if you drop the file in a green Pipe, your friend must be online on Pipe and ready to receive a file up to 1GB.
Blue Pipe: briefly blue pipe is the transfer you made when your friend is online on Facebook, but not on Pipe App itself. Just send a file and drop it on the blue pipe and your friend will be notified by getting an invite from you.
Grey Pipe: it’s the type of transaction you make when your friend is not completely available simply means when your friend is offline on both Pipe and Facebook, on that occasion still you can send a file to a locker for your friend to pick it up later.
So from this point of view we know that we can always make a file transfer no matter whether our friends and colleagues are available or not.

How it works

Pipe is a file transfer application that transfers files up to 1GB directly from one computer to another computer using peer-to-peer mechanism. To do this, Pipe uses the transfer protocol called RTMFP (Real Time Media Flow Protocol) from Adobe, which is based on UDP. RTMFP has a 128bit AES encryption for the communication channels between the sender and receiver’s computers which gives us the complete trust and on it. An in simple words this means files do not pass through Pipe or Facebook, as the file is transferred via a secure connection directly from your computer to your friend’s computer, or via a locker in other words, neither Pipe nor Facebook sees the files.

What is Pipe Locker

In case where the intended recipient is either offline, busy or unavailable the user can choose for the file to be uploaded to Pipe’s cloud-based storage called ‘locker’ via an HTTPS encrypted connection. Each locker can contain a file up to 100MB.

Facebook Integration

To establish the Pipe connection between friends whilst respecting the user’s privacy, Pipe uses only the anonymous 3rd party ID provided by Facebook. Pipe does not use real names or Facebook IDs for enabling the transfer of file.

Browser Compatibility

Pipe uses the very latest browser and Adobe Flash features and for this reason works best with Google Chrome and Comodo Dragon. Some Pipe features might not be supported by older browsers like IE6,8,9 I therefore recommend that users keep their browser up to date, and preferably use Google Chrome or Comodo Dragon.

Relay On Pipe

Even when users find themselves behind unusual network configurations or symmentic NAT’s, a file can still be transferred with pipe. In this case, the Pipe relay service forwards it between the two computers, but without ever storing the file. So it’s totally clear and understandable what Pipe App provides as a service is really reliable so go and get it. And believe me it has the potential to be a true game changer.

If you are willing to visit Pipe App’s official website feel free to browse from >> here.
And if you are really eager to jump to the App by clicking here >> Go to App. but before you do that make sure that you’ve logged in to your Facebook account.


Final note: If you face any problems while trying to test or use Pipe App. feel free to post your queries under the comments section below. All together if you really admire the little work I’m doing on LBR please show some love and don’t forget to leave your review in the comments section below… thanks

Friday, October 18, 2013

An Easy Solution For “Cannot Delete File or Folder Error” On Windows!

Occasionally the [cannot delete file or folder error] is one of the common errors for windows regular users, and it usually occurs whenever we install a third party software or application on our computer and then by uninstalling that specific software or at the moment of the installation an unwanted changes occur inside our computer’s registry paths and directories. Or on the other hand when there are some malicious spywares, malwares, and viruses that affect our files, folders, and change their permissions. And maybe when there are a background processes related to that file or folder.

And the truth is we really can't predict or control when that error will happen but we can solve the problem later on when we see the pop-up alert while trying to delete a file or a folder. Look the below pop-up alert windows snapshot and I bet you have seen it quite a lot if you are a regular windows user.


So now the question is how we can solve that error? The answer is simple and the easiest answer you'll ever find on online forums or on the internet in major will be to use utility software called Unlocker, and on this special post I will show you how to download, install, and use Unlocker to get rid of that error, so let’s roll.
  • Download Unlocker software from filehippo by click here >> Download.
  • After a successful downloading run the download [ .exe] file and give a complete UAC Permission and start to install the software by following the wizard instructions it will take less than a 40 seconds to install.

After installation, it integrates itself into your right-click windows explorer menu. Then when you get the dreaded “file is currently being used by another person or program” error box, just do the following to show that operating system who the real boss is:


  • As shown on the above image right-click on the offending file or folder and from the menu choose “Unlocker” menu item. The below box will then appear.


  • Again as shown in the above image you'll then get a list of certain system processes which represents the actual background tasks taking place on your processor in real time which are related to that offending file or folder. Just click any or all and then kill or unlock the offending processes. 
  • And after performing such a task on unlocker you can go back and try again to delete that folder or file and sometimes it may require a restart or reboot so give it the chance to do so and restart your computer and for sure it'll that file or folder will instantly be deleted.
Unlocker is really a tiny, small, and simple utility software and it won't require any updates because it will be automatically updated as long as you've an internet connection on your computer system, so download and install one time and it will be always updated and running smoothly. And always remember it’s an absolute dream when your Windows OS decides to start playing up and you're about to smash something in frustration. I recommend that Unlocker should be part of everyone’s computer set-up always and forever.

References

FileHippo: One of the richest freeware download servers over the globe if it’s your first time to hear about FileHippo you better visit their website by clicking here >> Download from FileHippo.com

MakeUseOf: Is a booming online technology magazine featuring cool websites, cool softwares and internet tips on a daily basis to browse the hilarious content out their visit their site by clicking here >> MakeUseOf 

Conclusion
As usual if you've any alternatives to unlocker or may be met some other amazing utility softwares that can perform a similar tasks let 
us know by leaving your review in the comments section below.

Monday, October 14, 2013

How To Add A Fully Functional Toolbar To Your VB.NET Application?

First off, I have to apologize for not blogging in so long, I am truly sorry to keep you waiting, but I had a lot of personal matters to arrange. Finally I am done with that and I am here to respond a question that a dear friend of mine Mr.Mansur Ali Shah posted under a snap-shot I have posted in BS CheEtaZz’s Facebook group/forum on October 9th at 6:54PM.

That snap-shot was about a simple application I have created using VB.NET which had a fully functional toolbar menu and Mr. Mansur particularly asked me how I have implemented such a fully functional toolbar on my application and on this short post I will show you step-by-step how I have did that. So follow me along and take advantage from these tiny steps.

  • Open a new project in visual basic and name it whatever you like.
  • Now you will have a ready project with a plane form accordingly named [ form1 ] on that stage don’t do anything else just go to the toolbox and search a tool object called MenuStrip under Menus & Toolbars section inside the toolbox, for more info look the below image as a reference.
By the way MenuStrip is the tool that gives you the functionality of a toolbar menu taps and that is what we need to add our form in order to get that toolbar functionality and later on we’ll give it a code to function. 
But for now just click that menustrip tool and drag it over your form surface.
  • Hopefully if you did the previous two steps correctly you’ll see on top your form a shaded portion like the one in bellow image which says type here. So it’s time to give your toolbar menu items a text or formally a name. So do that and run your application to see if the toolbar is there.
  • Now that we’ve done and decorated our form’s design by adding a toolbar items, let’s start coding,  and to make any specific item work accordingly we’ve to give it a command or certainly a code, and to do that you should double click that specific menu item which you want to give the code and at the moment you double click, it will take you to the coding environment and in there do your best coding skills and run your application again to check the code. That is what it takes to add your VB.NET application a fully functional toolbar.
Disclaimer: This post is not an academic review neither a regular tutorial, it’s just my own way to share information and tips with my respected viewers, friends, and classmates, and the truth is in order to answer Mr. Mansur's query just underneath his question I truly thought it will be much better if I made a post from it on LBR blog so that ever online viewer could take advantage from the detailed answer.

Special Thanks to Mr. Mansur Ali Shah for tagging such an informative question which made me able to write an article from it. Thank you indeed.

And at last but not at least if you really admire the little work i am doing here at LBR please show some love and leave your review under the comments section below. i have also to mention discussions are open so feel free to raise your questions.

Thursday, September 26, 2013

Lockify! A Fully end-to-end Encryption For Your Confidential Messages

With the entertaining, enormous, and magnificent inventions of today’s world especially in the technology arena software development is a major part more specifically the web applications. And exactly from the invention of Google Chrome web applications has largely expanded in a variety of categories which include business tools, office apps, entertainment, education, lifestyle, productivity, social & communications, utilities, extensions and themes.

And fortunately Google Chrome lunched a new niche of web applications that can run on desktop environment without any extra requirements, just download them and run them. If you want to experience some of that applications visit here >> Desktop-apps.

With that keeping in mind to day I want share with a unique and amazing app called Lockify, Lockify is an encryption software which will give you a fully end-to-end encryption for your messages, with Lockify your confidential message is encrypted on your machine. And it will never enter the cloud unencrypted and only you have the decryption key- in the form of a link- which you can share with whomever you like, however you like. And after they receive and click the link verification will be asked in order to view the encrypted message and the receiver should verify the link you’ve have instantly sent to him/her according to a verification method you specify, and that verification could be a question you pose to them, a password you share with him/here, their email address, or their twitter username. And for assured security the best verification option is a password you share with them which means only those you give the password can decrypt the message.

Well now that we understood what Lockify really is? And what it can do for us it’s obvious and convenient to think about how to setup and install the app. So let’s do that and enjoy the best encryption smart application ever. Follow the below steps.
  • Go to this link >> Download Lockify App.
  • After you do that the installation process will start instantly and you have to wait a moment till the process finishes, the speed of the installation process really depends on your computers capacity and your internet speed unless that the app is very light and small.
  • When the installation completes your computer will notify you and you will see a new icon on your task bar just click that icon and you’ll see the Lockify app inside the panel click the Lockify icon and that is it.
  • The Lockify app will smoothly come handy after this stage and its app to you what you’ll do next and don’t panic the Lockify app is self explanatory software. You run the app you’ll see everything in front of you and again it’s up to you what you will do after that. And good luck with a fully end-to-end encryption software on your hand, enjoy it and share with your fellows and friends.

Final note: The progress that Chromium family made so far is really wonderful and certainly helpful to many regular users like me, so as a grateful fellow I have to say thanks to the chromium team and let me give you a free giveaway link to get one of their rare and special software they have ever developed. Click here >> Giveaway.


And if you truly inspire LBR blog, and the little work I am doing here please show some love by leaving your comment on the below comments section, because that will help me gain some traffic loops. Thanks

Wednesday, September 25, 2013

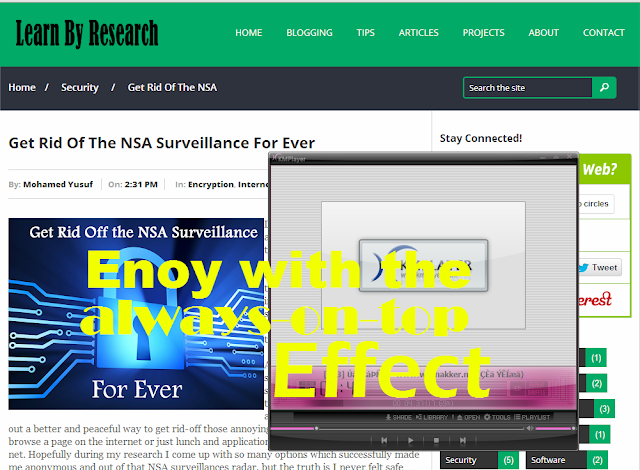
How To Make Your Favorite Window On Top Of The Other Windows?

Have you ever wanted to run and navigate between multiple windows on your desktop while specifically making one of those windows on top of the other windows, have you ever wished to watch a debate, TV-show, movie, or a music clip on VLC, Windows Media Player, or any other available video player while chatting with a beloved one, a friend or a member of your lovely family on Facebook. I personally had exactly the same imaginations and thoughts for a long time till I finally get simple and useful trick to make that happen.

Honestly there are a variety of ways that we can follow to make specific window always on top of the other windows, and some of these ways may require extra experiences and knowledge about computers particularly the softwares and coding. But don’t worry the trick I am  going to share with you is not none of these its simple as “ABC” and useful like any other tricks I shared with you so far on LBR site. So let’s get started and begin our journey to experience and feel the difference of been joined to the computer professionals crew just be with me and follow these below simple steps. But before going to the steps let me remind you we’ll use a freeware application called always-on-top which is a portable app which means we won’t install anything we’ll just run it and use it. So let me guide through the steps smoothly.
  • First and for most try to prepare at least two windows i.e. a web browser and any other application like notepad, and for sure that will give us the ability to bring one of the two windows on top of the other one even when we are working on some other window, don’t be confused just go ahead and proceed you’ll definitely enjoy shortly.
  • Now go to this link <<download-link>> and download the always-on-top application, after you download the file you’ll see that the file is a zip file which means you’ll need some unzipping tool like Winrar or 7zip or hopefully if you are on windows 7 or on windows 8 operating system you won’t need any extra tools to unzip the file just double click it and you’ll see two files inside the zipped file [always-on-top.ex and readme.txt] files, for now let’s forget the readme file and again double click on the one that says always-on-top.exe.
  • If everything went correctly you’ll see a popup windows which asks you to run the application just click run and that is it now you've unzipped the file and started the application, to check whether always-on-top is running or not look into the right-bottom corner of your task bar the try icons area hopefully you’ll find an icon with “DI” letters.
  • Now that we make sure always on top is running let’s go deep and perform the final and the most importantly task which is making one window on top of other. To do so just navigate through your open windows and just pick a one just like notepad now click the title bar of that specific window when you click the title bar of the wanted window now leave the mouse and go to your keyboard and please do this carefully because if you won’t get the always on top feature.
  • As soon as you are on your keyboard just press Ctrl and while keeping it press the Space bar (Ctrl + Space bar), and the reason we are doing this is because always-on-top application works with hotkeys. And after pressing these hotkeys your always on top effect is running and the window you selected will be always on top until you close it.
NB: if you want to disable the always on top effect just again click the window and again press the hotkeys. And the always on top will disappear.

Final note: now you can enjoy watching videos on vlc or windows media player over any other window, therefore if you get this post useful don’t forget to share the news with your friends, family and special ones. And please show some love to LBR blog and leave your review questions in the below comments section.

Tuesday, September 17, 2013

Get Rid Of The NSA Surveillance For Ever

Due to the NSA's surveillance  on almost every internet transmission except the encrypted ones, and their backdoor gates on every windows equipped system, the entire regular internet users including me myself are still struggling to find the best ways and options to be anonymous on this rare and epic situation.

And since the beginning of the struggle particularly when I read some articles and news feeds talking about PRISM, XKeyScore, and Tempora, I was trying to find out a better and peaceful way to get rid-off those annoying eyes watching me whenever I browse a page on the internet or just lunch and applications which is synchronized to the net. Hopefully during my research I come up with so many options which successfully made me anonymous and out of that NSA surveillances radar, but the truth is I never felt safe and secure in so many ways until a friend of mine Mr. Subeer Muse a freelancer, penetration tester, and security guru. The initiator of SEH group and top level co-author at aqoonwadaag website, gave me a link to a website called prism-break which contains a huge and massive information, softwares, plug-ins, tips and tricks all about how to stop governments and surveillance agencies from spying on you by encrypting your communications and ending your reliance on proprietary services. And believe me by just landing that website I felt safe and secure because there are a plenty of options available for almost every existing system including Apple OS X, Windows, Linux, and even for Android operating systems.

The lists of the useful and available applications on that site are too much to mention on this particular post but I will shortly tell you the gist as well as some of my favorite ones. By suggesting secure alternatives for existing proprietary services like operation systems, web browsers, chatting applications.

Operating Systems

Instead of using Mac OS X, Google Chrome OS, and Windows Os you better use one of these GNU/LINUX alternatives [Debian, Fedora, Gentoo, Linux Mint DebianEdition, openSUSE] and if you are interested in the Linux BSD based operating systems you may check [openBSD]. Don’t panic all of these are secure, reliable and open source Linux operating systems, if you need more info regarding one of these operating systems you may click the link or just Google it yourself. Unfortunately if you have iOS or Windows Phone operating systems you better replace the device because these operating systems have no free alternatives.

Web browsers

If you are eager to get more browsing security and privacy options you must particularly use Tor Browser Bundle which is encrypted and anonymous web browsing powered by Tor network. JonDonym is also a great browsing option after Tor because it has special JonDo IP anonymization service and JonDoFox profile for firefox. And remember these two above browser systems are IP HIDDEN systems which mean they can be completely anonymous with no worries.
Mozilla Firefox is the third option to check because it’s fast, flexible and secure web browser with a vibrant add-on ecosystem. If you are using android equipped tablet or phone you better check Orbot which is the Tor Browser Bundle version for android systems. On the other hand if you are a regular user for iOS you should use Onion Browser.

Chatting and instant messaging Alternatives

Normally people communicate across the internet using popular emailing and instant messaging applications and social networks, but if you want a secure medium you better use one of these two amazing and user friendly tools:
  • CyptoCat: which is a private web based add-on and encrypted instant messaging within the web browser. And as I’ve experienced it works only on Google Chrome and Comodo Dragon web browsers. you can get cryptocat from here >> Download.
  • TorChat: which is Peer-to-Peer (P2P) chat built on Tor Hidden Services not sponsored by the Tor Project, and so far this is my favorite although I previously admired CryptoCat and for simplicity set up if you are a newbie CryptoCat is good for you. get torchat from here >> Download.


Final note: As I earlier told you at the beginning of the post there are a huge alternatives and tools to talk about and I can’t gather all that information on this small post I rather advice you to take your own adventure and explore your personal experience by visiting prism-break’s official website from here >> prism-break org.

At last but not at least some of the above applications and tools may require team participation for instance chatting applications like cryptocat and torchat because you won’t understand how they exactly work unless you check them and the only way you could do so is if you have an end user receiver.

If you inspire LBR or particularly this post don’t forget to show some love by leaving you review in the comment section below.


© 2013 Learn By Research. All rights resevered. Designed by Templateism

Back To Top